Travelling with your therapy equipment is now made easier, thanks to ResMed's device technology.
Show me the way to...
![]()
txt
Show me the way to...
![]()


Travelling with your therapy equipment is now made easier, thanks to ResMed's device technology.
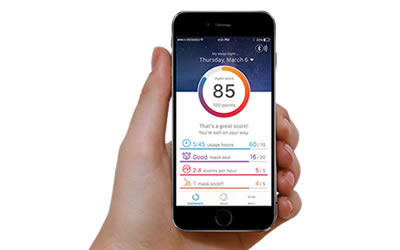
AirMini app enables you to use your AirMini machine right from the palm of your hands!
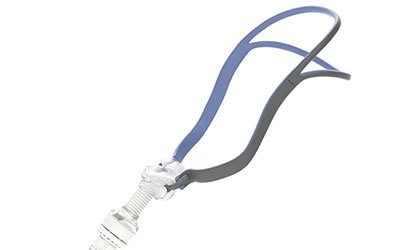
AirFit P10 for AirMini combined with AirMini represents ResMed’s smallest sleep therapy system.
Travelling with your therapy equipment is now made easier, thanks to ResMed's device technology.
AirMini app enables you to use your AirMini machine right from the palm of your hands!
AirFit P10 for AirMini combined with AirMini represents ResMed’s smallest sleep therapy system.
Our products are designed to make travelling easy. Here are some useful tips.
AirMini app enables you to use your AirMini machine right from the palm of your hands!
AirFit P10 for AirMini combined with AirMini represents ResMed’s smallest sleep therapy system.
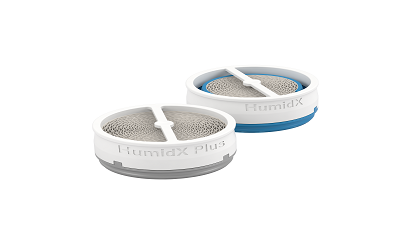
Exclusive to AirMini, HumidX and HumidX Plus are small heat and moisture exchangers (HME) that are designed to provide comfortable and effective humidification.
Read more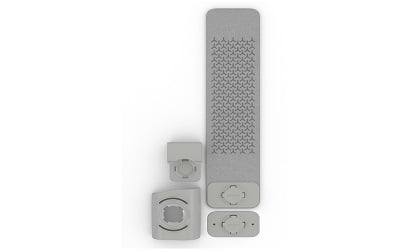
The ResMed mount system allows the AirMini device to be secured to various points such as a bedframe, bedside table, wall or airplane seat pocket.
Read more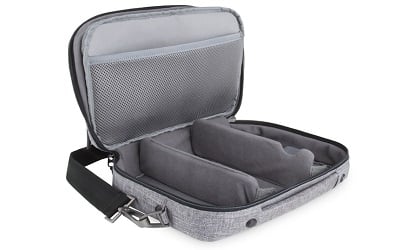
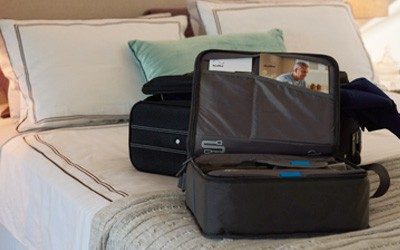
Take your sleep therapy everywhere you go with the AirMini Travel Bag. Small and compact, it’ll fit the whole solution to keep everything together – so it’s always ready when you are.
Read more
Exclusive to AirMini, HumidX and HumidX Plus are small heat and moisture exchangers (HME) that are designed to provide comfortable and effective humidification.
Read more
The ResMed mount system allows the AirMini device to be secured to various points such as a bedframe, bedside table, wall or airplane seat pocket.
Read more
Take your sleep therapy everywhere you go with the AirMini Travel Bag. Small and compact, it’ll fit the whole solution to keep everything together – so it’s always ready when you are.
Read more*Combined responses of those expressing a preference in an independent patient survey in the USA, UK, Germany, France and Australia, from May 2015. Visit www.resmed.com/maskbrand


